![]()
Donec efficitur, ligula ut lacinia
viverra, lorem lacus.
![]()
Donec efficitur, ligula ut lacinia
viverra, lorem lacus.

 So you’re the type that thinks ahead and you’ve finished your holiday shopping–but you’ve blown all your cash on gifts without remembering wrapping paper. Sure, you could just use newspaper, but that’s so overplayed. Why not surprise your gift recipients with how clever and crafty you are? Make gift bags out of freely available shipping envelopes! Here’s a step-by-step explanation with photos at every stage of how to use a Tyvek envelope to make cool gift bags.
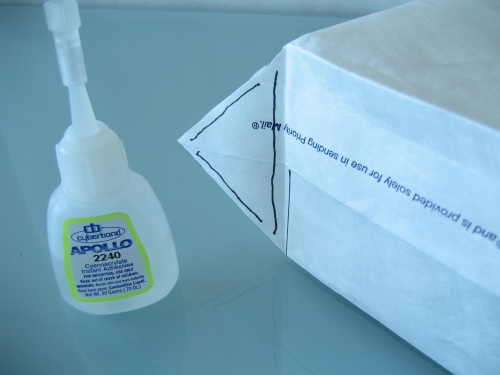
I came up with this idea when I had to go to an engagement party directly after work. I picked up a bottle of champagne during the day, but forgot to grab some sort of gift bag while I was there. Seeing as my office had plenty of Tyvek shipping envelopes, I grabbed some super glue and scissors and made a small little wine-bottle-sized gift bag and made it to the party in time. Here’s step-by-step instructions with photos for to make a small gift bag out of a Tyvek envelope.

“This packaging is the property of the U.S. Postal Service and is provided solely for sending Priority Mail. Misuse may be a violation of federal law.” You don’t have to use a Priority Mail envelope if you’re worried the feds will show up at your door. These instructions work for any Tyvek envelope.
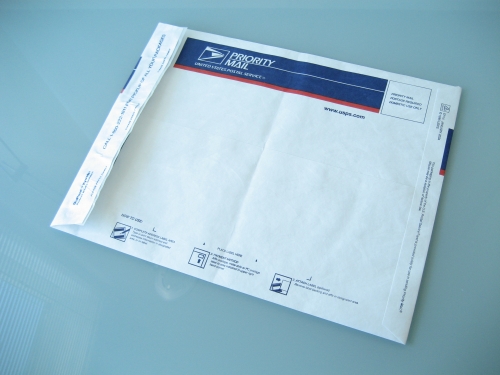
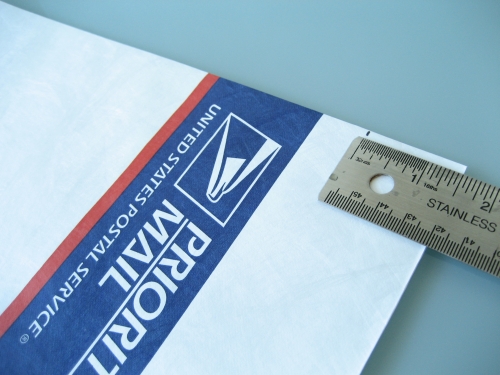
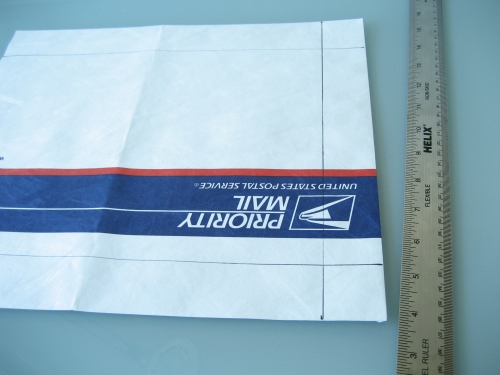
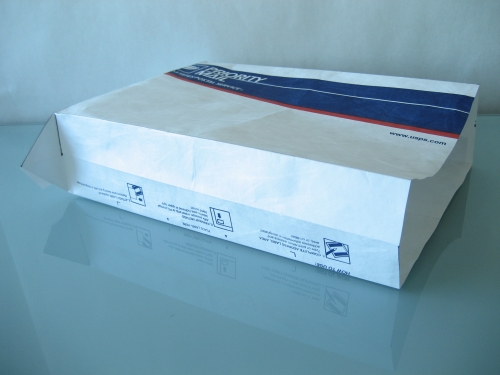
Get yourself a Tyvek envelope.
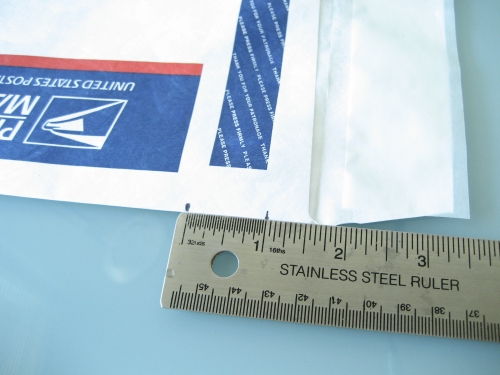
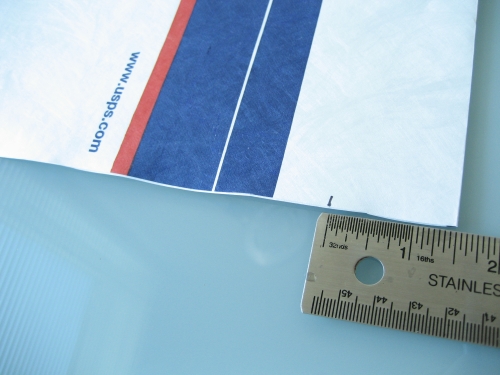
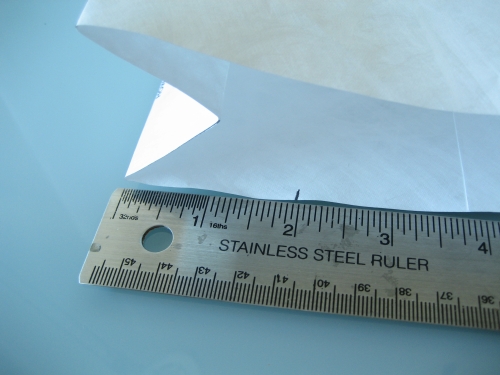
Measure 1 1/2″ down from the top of the inside of the top of the envelope and make a mark. Make another mark 1/2″ down from the top.
You don’t necessarily need to make all the marks I did on the bags. You can just make a few marks at each end and then use the ruler as a guide and then cut between the marks with a straight razor or X-acto knife.
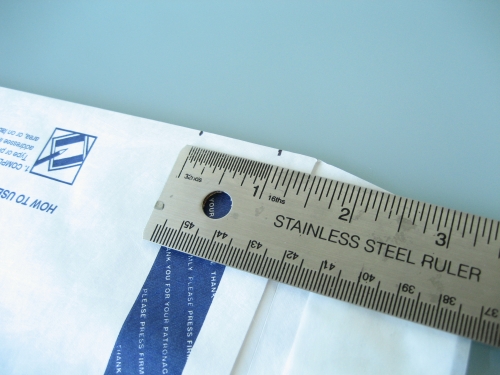
Do the same on the other side.
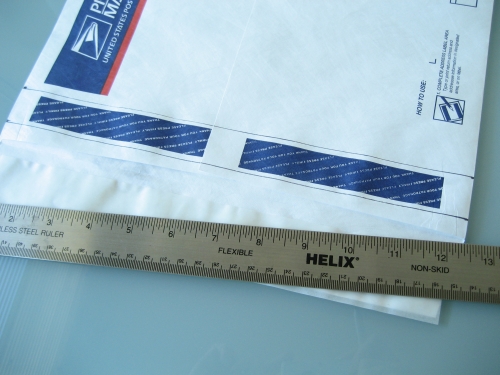
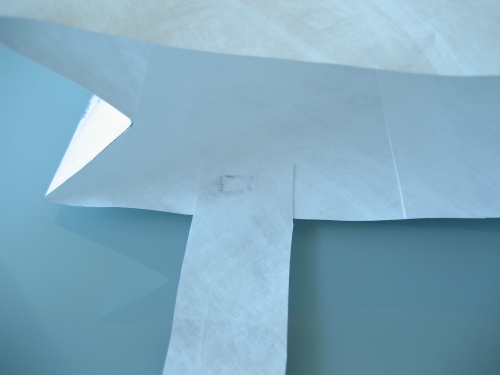
Now, connect each of the marks you made on each side so that you end up with a 1″ wide row directly over the “press here” part. This will make one of the handles.
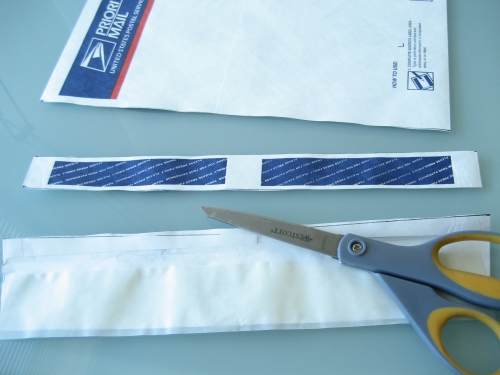
Cut along the lines and discard the bottom piece, leaving only the 1″ strip.
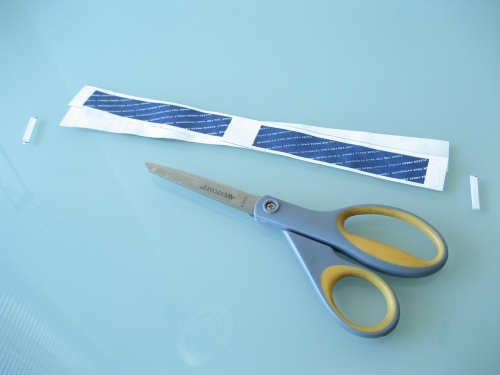
Cut off the two edges of this strip, leaving two separate handle pieces.
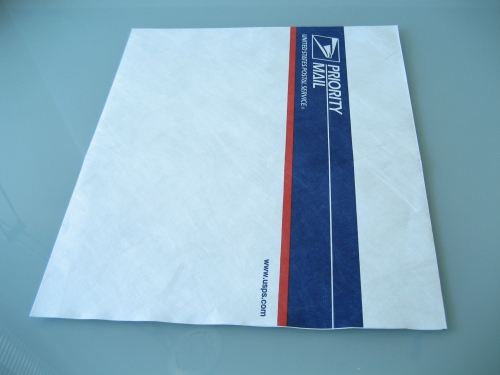
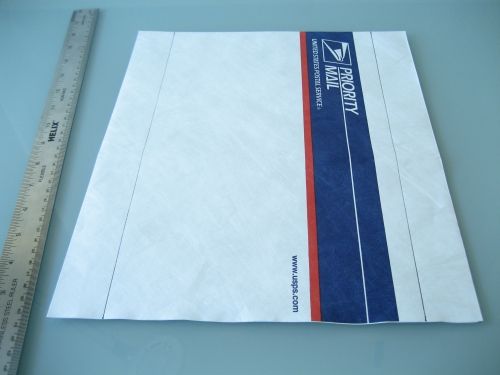
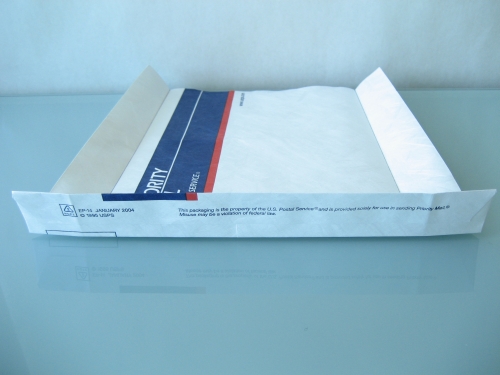
Turn the rest of the future-gift-bag vertically with the open side towards the bottom.
Measure in 1 1/2″ from each of the sides and make a mark at the bottom.
Do the same for each of the sides at the top edge.
Now connect the two marks you made at the top and bottom edges.
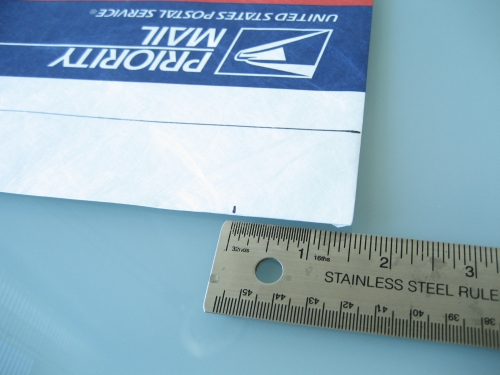
Turn the envelope clockwise so that the closed edge is at the right. Measure down 1 1/2″ and make a mark. Do the same thing at the other side.
Connect the two marks with a line. Do the same along the other side.

Fold the edges up along the two lines you made.
Fold up the bottom along the line at the bottom of the bag.
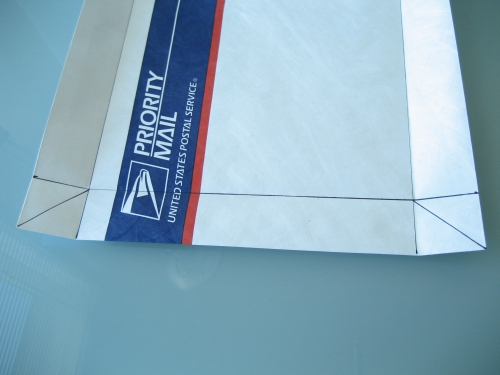
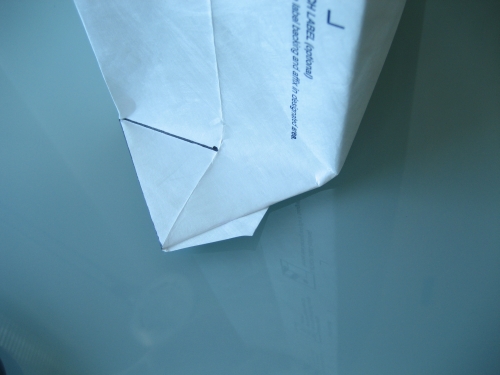
At the bottom corners of the bag, connect the edges of the squares there with a diagonal line sloping downward.
Now, stick your hand in the inside of the bag and reverse all of the folds you made along the edges to make a box shape. Fold along the two diagonal lines you just made to create two triangular flaps on each side of the bottom of the bag.
Fold these two flaps inward along the line at the bottom.
You’ll notice there is a weird little bit hanging off the edge of the flaps.
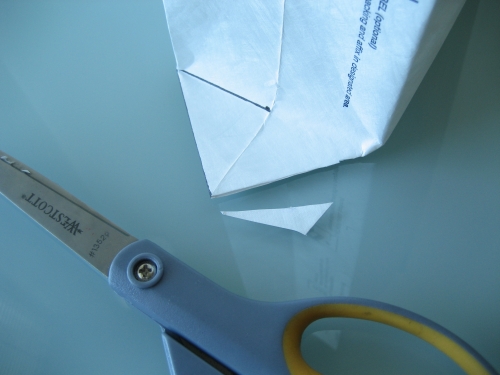
Cut this off from both sides.
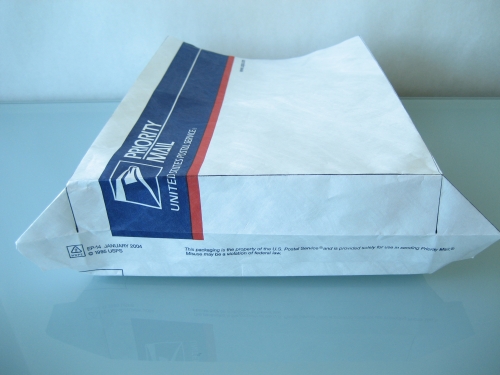
Put the bag again on its back and fold the two flaps down on to the bottom. Make sure that all the edges are straight.
Grab some super glue and put a glue line along each of the inside edges of the flaps as marked with lines in order to glue them against the bottom (the left side is shown here posing handsomely with a bottle of glue).
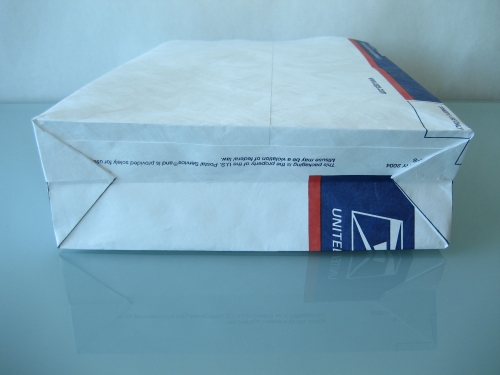
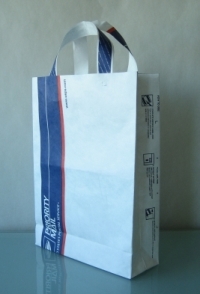
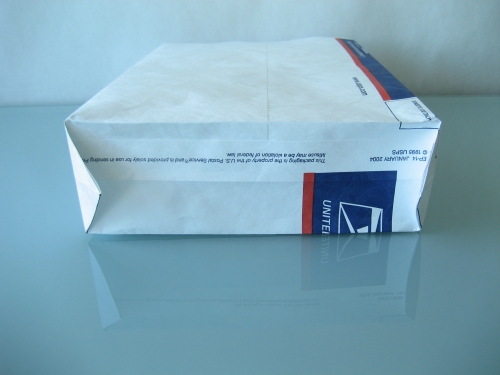
The finished result should look like this.

Now, flip the bag around so you’re facing the open side and push in the sides like this.
If you want to store your bag flat before you put gifts in it, flip it around again and fold the bottom down against the side like this. It will also make your bag look more authentic, if you’re going for that.
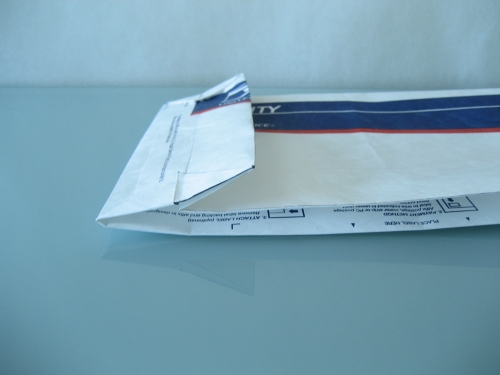
So flip the bag around one more time to face the open side. To designate where the handles go, measure in 2″ from each side and make a mark.

Here’s a photo showing where you’re going to glue each end of the handles.
Grab one of the handles you cut earlier and glue one of its ends where you marked. Make sure the printed side faces down.
I wouldn’t recommend using a permanent marker to mark where you need to glue, since the super glue causes the ink to bleed. Use a pencil instead.
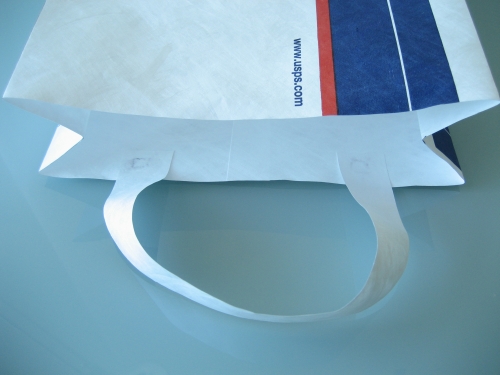
Keep the other end of the handle parallel and glue it at the mark you made on the other side.
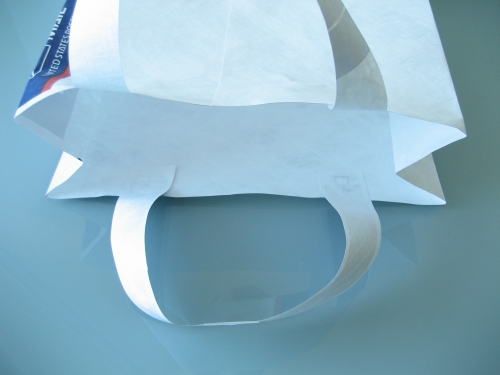
Flip the bag over and do the same to the other side.
Stand it up and you’re done!
These instructions work with any Tyvek shipping envelope. Feel free to post a link to your own creation in the comments.
Happy holidays!